


 Cleaners
Learning how to deep clean a kitchen mostly comes down to order. Grease rises with cooking steam and settles on every high surface, then dust sticks to it. Crumbs fall into seams, under appliances and along the floor. If you start at the bottom, everything you knock loose from above lands on the part you already finished.
This guide works from the ceiling down. It draws on the University of Illinois Extension guide to cleaning the kitchen, GE Appliances' care page for range hood filters, the InSinkErator guide to disposal care and the Natural Stone Institute's advice for stone counters. Everything we say about our own products is taken from their labels.
The short version
Clear the counters, then clean from the top down: cabinet tops, hood and lights first, then backsplash and counters, then appliance fronts and insides, then the sink and drain, and the floor last. Let ovens cool and follow the maker's manual, soak hood filters in hot water with detergent, and use each cleaner only on the surfaces its label lists.
Chapter 01
Kitchen deep cleaning checklist
Everything on one page, in working order
A kitchen deep cleaning checklist covers the places you normally skip, like the cabinet tops, the hood filters and the strip of floor under the toe kick. Regular kitchen cleaning keeps the room usable. A deep clean resets it.
Before you begin, clear every counter, empty the dish rack and run the dishwasher so the sink is free. Gather cloths, a soft brush, a bucket and a sponge that won't scratch. Pull a cooler out if the fridge is on your list; the Illinois guide suggests keeping perishables cold in one while you work.
We work the kitchen cleaning checklist in this order:
- Cabinet tops, upper doors and handles
- Range hood exterior and grease filters
- Light fixtures and switch plates
- Backsplash and counters
- Appliance fronts: fridge, dishwasher, oven door, microwave
- Oven interior and racks
- Microwave interior
- Fridge shelves, drawers and door seals
- Dishwasher filter
- Sink, faucet, strainer and disposal
- Lower cabinet doors and toe kicks
- Floor, starting under the appliances you can move
Tape it inside a cabinet door and check items off. A long job feels shorter when you can see what is left.
| Zone | What to clean | Reach for |
|---|---|---|
| High | Cabinet tops, hood, lights | Surface Cleaner |
| Middle | Backsplash, counters, fronts | Surface Cleaner |
| Inside | Oven, microwave, fridge | Your manuals |
| Low | Sink, drain, floor | Dish Soap |
Chapter 02
How to deep clean kitchen surfaces top to bottom
Clean once, in the right order
If you only need the order, this chapter is it. Later chapters go deeper on the oven, sink and appliances.
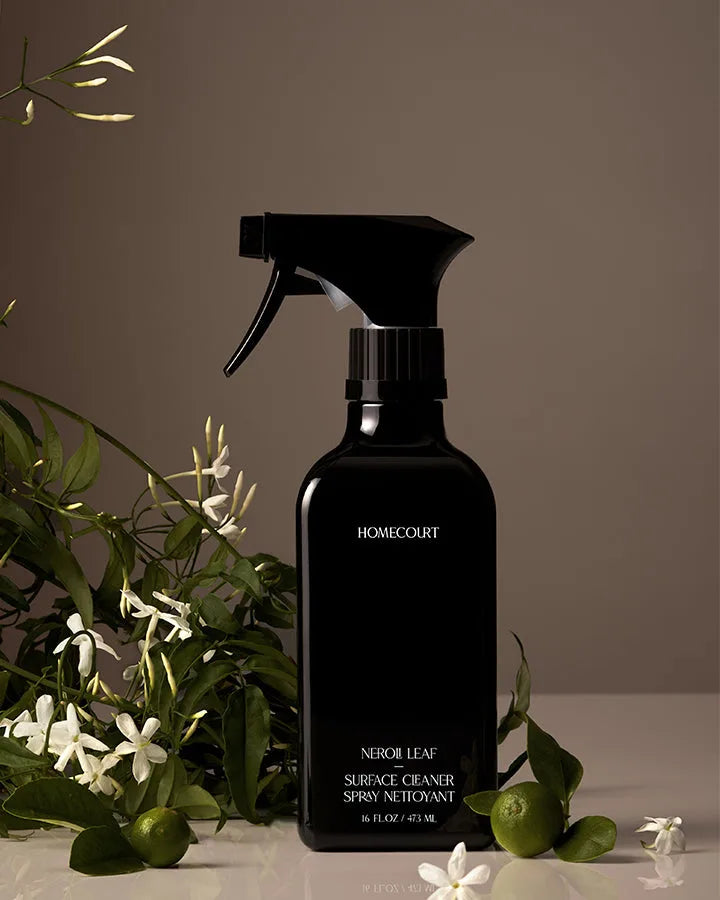
Most people searching how to clean kitchen surfaces want one bottle that works everywhere. No single product does, and a good non toxic kitchen cleaner says plainly where it belongs. Our Surface Cleaner is a non-toxic kitchen cleaner whose directions name five surfaces for its spray: finished wood, tile, sealed stone, stainless steel and granite. Glass isn't on that list, so mirrors, glass cabinet fronts and light covers get a glass cleaner instead.
Start high: cabinets, hood & lights
Grease climbs, so you start at the ceiling
Stand on a step stool and look at the tops of the upper cabinets, where sticky dust collects out of sight. Wipe it with a damp cloth first to lift the loose dust, then mist the Surface Cleaner onto finished wood cabinet tops and buff with a lint-free cloth until dry.
Work down the upper doors next, especially the edges and handles. This is how to clean kitchen cabinets without soaking them: a light spray on the cloth or the surface, a wipe and a dry pass.
On the range hood, wipe the stainless steel exterior the same way and save the filters for the oven chapter. Turn the lights off and let the bulbs cool. Glass light covers come down for a wash in warm, soapy water, and switch plates get a barely damp cloth.
Backsplash & counters
Clear, spray, scrub the grout, dry
A tile backsplash is one of the five surfaces the spray is made for. Spray a section, let it sit while you move to the next one, then wipe from the top of the tile down so drips land on a part you haven't cleaned yet. A soft brush lifts grease out of grout lines.
Counters come next. Granite and sealed stone are both on the label, so spray, wipe with a soft cloth and buff dry. Pull small appliances away from the wall and clean the crumb-filled strip behind them. Wipe their cords and feet before you push them back.
Appliances
Fronts now, insides in their own chapter
Clean only the outsides on this pass. Stainless steel fridge and dishwasher doors take the Surface Cleaner; wipe in the direction of the grain and dry with a clean cloth to avoid streaks. For a glass oven door or a glass cooktop, check the manual for the cleaner its maker recommends. Handles, knobs and control panels get a cloth that is damp, never dripping.
Sink & faucet
The last stop before the floor
Leave the sink until the counters are done, since you will rinse cloths in it all along. Stainless steel basins are fair game for the spray. Chrome and other faucet finishes are not, so wash the faucet with warm water and a little dish soap, then dry it with a soft cloth to stop water spots.
Floors last
Everything you knocked loose ends up here
If you can do it safely, pull out the appliances that roll or slide and sweep behind them. Wipe the toe kicks and lower cabinet doors, then sweep or vacuum the whole floor before you mop. Follow the flooring maker's care advice for the mop itself; for a sticky spot on tile, a spray of Surface Cleaner and a damp cloth lifts it.
Chapter 03
How to deep clean oven & range hood
Cool, empty & by the manual
The University of Illinois Extension says to make sure the oven is cool and empty before you clean it, and to follow the manufacturer's instructions. It also warns against using oven cleaners on self-cleaning ovens, since they can damage the oven's surface. With a self-clean oven, read the manual before you reach for any product.
To deep clean oven parts, go in this order:
- Take out the racks and let them soak in hot, soapy water in the sink or a tub.
- Brush or vacuum loose crumbs and burnt bits from the oven floor.
- Clean the interior with the method your manual allows, keeping cleaners away from heating elements.
- Scrub the soaked racks, rinse and dry them before they go back in.
- Wipe the door seal gently, or not at all if the manual says to leave it alone.
For a longer walk-through of natural methods, our guide to easy steps for a grease-free oven covers baking soda, racks and the glass door in detail.
Here is how to clean range hood filters, using GE Appliances' care page for metal grease filters as the guide:
- Slide or unlatch the filters and pull them down and out.
- Soak them, then swish them around in hot water with detergent.
- Use a soft brush for embedded grease if you need it.
- Skip ammonia and anything containing it, which GE warns against.
- Let the filters dry completely before you put them back.
GE says the dishwasher is acceptable for metal filters but may discolor them. For normal cooking, GE suggests cleaning the filters about every six months, or as needed. Frequent frying shortens that.
Chapter 04
How to clean kitchen sink & drain
Basin, strainer & what sits below
Knowing how to clean kitchen sink parts means looking past the basin. The food that makes a sink smell hides in the strainer and the disposal, even when the steel shines.
Start with the strainer basket and stopper. The Illinois Extension recommends washing sink strainers weekly; today they get a real scrub with a brush in hot, soapy water. Homecourt Dish Soap is made with plant-derived surfactants for food residue and glycerin to help protect your skin. A few pumps on a brush is enough.
For a stainless basin, spray the Surface Cleaner, work it around with a soft sponge, rinse and dry. Don't forget the seam where the sink meets the counter.
If you have a garbage disposal, InSinkErator suggests a few ways to freshen it:
- Grind citrus wedges, like lemon or orange, one at a time with a steady stream of cool water running. The rinds help clean the grinding parts and leave a fresh scent.
- Use ice cubes if you like, but InSinkErator notes that ice usually melts before it cleans the grind chamber completely.
- On models with a removable baffle, pull it out of the collar, rinse it and wipe off the food residue.
InSinkErator also notes that its disposals have no blades to sharpen at all.
Key takeaway
A sink is only as clean as its strainer, so scrub the parts that hold food, not just the steel you can see.
Chapter 05
Deep clean kitchen appliances
Microwave, fridge & dishwasher, inside out
When you deep clean kitchen appliances, the goal is the inside: the spatters on the microwave ceiling, the sticky drawer in the fridge and the filter at the bottom of the dishwasher.
Microwave. Start with the manufacturer's instructions. The Illinois Extension says not to use oven cleaner, steel wool or abrasive cleaners inside a microwave. For caked-on food, it suggests heating 6 tablespoons of baking soda in 1 cup of water, in a microwave-safe dish, until the mixture boils. Leave it inside with the door closed until it cools, then wipe the interior with a cloth.
Refrigerator. Move the food you're keeping into a cooler. Take out the shelves, drawers and other removable parts and wash them by hand in hot, soapy water. For the doors and interior, the Illinois guide suggests a mix of 2 teaspoons of baking soda in 1 quart of water. Leave the door open for 15 minutes so it can air-dry before you put food back. Finish with the stainless steel exterior and the handles.
Dishwasher. The same Illinois guide passes along Whirlpool and Kenmore advice on odors, and it starts with the step most people skip: clearing food and debris from the filter at the bottom. Your manual shows how the filter comes out.
If you want a set that covers the whole room, the Kitchen Tray Set puts the Surface Cleaner, Hand Wash and Dish Soap on a signature Homecourt tray, wrapped in a gift box. It keeps the bottles you use most together by the sink.

Homecourt for the kitchen
Chapter 06
How often to deep clean a kitchen
Let the room tell you when
No official calendar says how often a kitchen needs a full deep clean. A kitchen that cooks for a family every night builds up grease faster than one that mostly sees takeout. Watch for the signs:
- The cabinet fronts feel tacky near the stove.
- The hood filters look dark or the fan seems louder.
- The fridge has spills you have been working around.
- The sink smells even after you rinse it.
Some parts run on their own schedules. GE Appliances suggests cleaning metal hood filters about every six months for everyday cooking. The Illinois Extension recommends washing sink strainers weekly. The University of Florida's IFAS Extension advises clearing out the refrigerator regularly and the cabinets periodically to discard expired food.
Deep cleaning kitchen surfaces is easier when the daily habits hold, and every wiped spill makes the next deep clean shorter. If you are rethinking the products under your sink as well, our post on switching to natural kitchen cleaners explains what changes when you do.
Key takeaway
Clean the filters, strainers and fridge on their own rhythms, and save the full top-to-bottom pass for when the room shows it needs one.
Kitchen deep cleaning FAQ
Short answers for a long job
How long does it take to deep clean a kitchen?
Longer than a regular clean, and how much longer comes down to the kitchen's size, the time since the last one and how many appliances you open up. If a full day isn't realistic, split it: cabinets, hood and counters in one session, then the oven, fridge and floor in another. That fits UF/IFAS advice to choose projects that fit the hours you actually have.
What is the difference between cleaning & deep cleaning?
Regular cleaning handles what you see every day. Deep cleaning reaches what you don't: cabinet tops, hood filters, the inside of the oven and fridge, and the floor under the appliances. One keeps the kitchen running; the other resets it.
What should you not use on stone counters?
The Natural Stone Institute care guide warns that products containing lemon, vinegar or other acids may dull or etch calcareous stones like marble, and that scouring powders and creams can scratch some stones. It recommends a neutral cleaner, stone soap or a mild dishwashing detergent with warm water, then a rinse and a soft-cloth dry. It also warns never to mix ammonia and bleach. Our Surface Cleaner lists granite and sealed stone on its label, and those are the only stone surfaces it is meant for. Once you know how to deep clean a kitchen with stone counters, a soft cloth and the right bottle do most of the work.
More kitchen cleaning guides
Keep reading
Cleaners Cleaners
Non-Toxic Kitchen Cleaner Surfaces
Casandra Tayag October 29, 2026 Cleaners